Well Kallie and I have been quite busy the last few weeks. The weather here has been warming up much earlier than most years and various plants are responding by budding out. Some days it has even hit 70+ degrees, which certainly feels much better than the freezing cold. I just hope that a hard freeze doesn’t roll in and hurt all the budding plants.
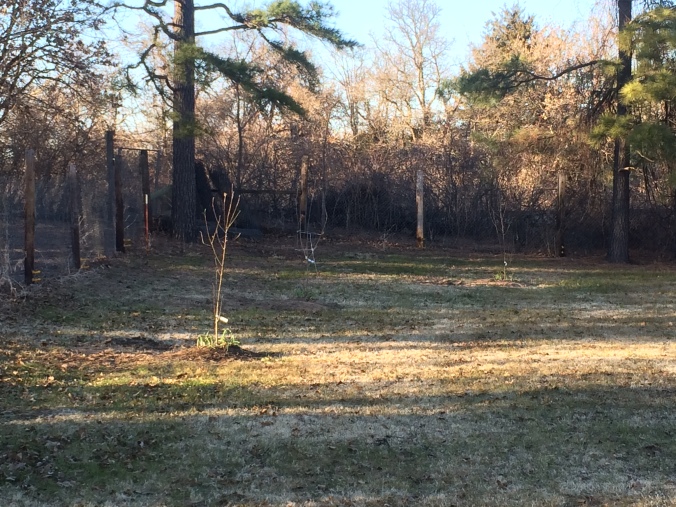
Speaking of plants, we decided to plant the apple trees because their plastic pots split this winter from being so brittle. We selected a location towards the back of our property that receives plenty of light and hopefully won’t be too wet for them. The soil in this part is about 18 inches of very fertile, dark sandy loam. Underneath that is much less fertile, light colored sand/clay mixture. This location, being lower than the rest of the property, will usually always have moist soil within the first foot. Hopefully this means we won’t have to water the trees ever as they should put roots down to find the water.
I wanted to add a natural fertilizer to all of our new plants this year, one that I knew would work. Horse manure! If you have never used horse manure to fertilize before, I will tell you it works! The one thing you have to remember is to only use aged manure, meaning at least a year old. Otherwise the manure will be too strong and will kill the plants. I called up a local horse stable and asked if they had any old manure laying around. Dumb question as barns always have a ton of manure they are just trying to get rid of. So I went out to their barn and loaded up two truck loads and brought them back to the homestead.
I dug the holes for the apple trees at least twice as wide and deep as they needed to be. This is because I wanted to add a good layer around the trees of manure enhanced soil and because I wanted the soil to be softer so the roots can grow into it faster. Then Kallie and I back-filled the holes with a mixture of 50% original soil, 25% aged horse manure, and 25% chicken poop/shavings from cleaning out our coop. When we placed the trees into the hole, we made sure they were above ground level so we could slope the ground up to them. Lastly we staked them to prevent the wind or dogs from knocking them over.
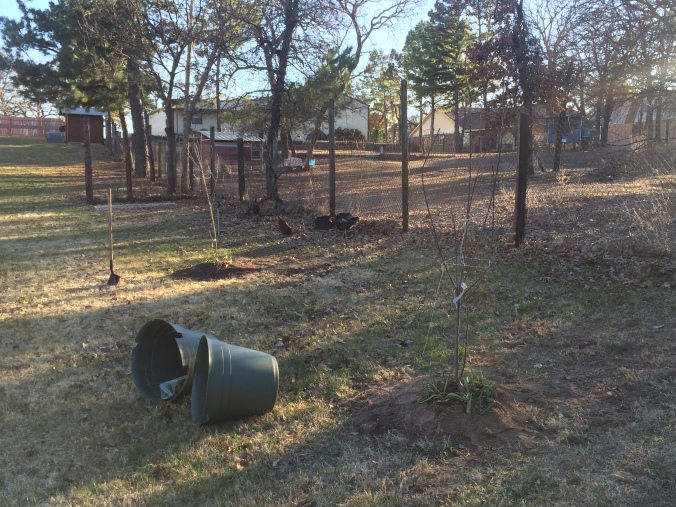
You can see our garlic plants around the tree base.
Three apple trees, not staked yet.
Recently a new Tractor Supply store opened near us which is really exciting. Being the beginning of spring, they had a ton of plants for sale. We bought two strawberry plants, two concord grape vines, two pear trees, two raspberry vines, and probably more that I am blanking on right now. The pear trees we planted closer to the house on a hill since they prefer well drained soil. The grape vines grow well in all soils especially wet dense soil so we planted those in the wettest, most fertile ground on the property. We provided a fence for them to grow up on. The strawberries and raspberries will be planted in due time. Manure was mixed in with the soil for all these plants, of course.


Bees:
Kallie has been wanting bees for a long time. Since we have the room, and beekeeping sounds exciting, we decide to learn a little more about the hobby. I was surprised to find out that there is well over 400 beekeepers in this part of the state, probably even more than that. I had no idea that the hobby was that popular. After going to a beekeeping club meeting (COBA) and taking a beginners class, we are very excited to get started.
We bought some bee hive kits from a local beekeeping supply store along with a whole starter kit. Now, normally we would try to build stuff like this on our own but it was actually cheaper for us to buy the pre-cut kits and just assemble them versus buying the wood from a store and making them all from scratch. In total we spent about $300 to buy four deep frame boxes, all the frames needed, wax coated plastic foundation, two tops, two bottoms, a beekeeping jacket with veil, gloves, hive tool, and smoker. We literally have everything needed to start two separate hives (except the bees). This brings up an important point: everyone we talked to says it is wise to start with two hives in case one doesn’t make it. It’s also important for beginners because you can have something to compare them to.


Assembling the hives and frames was not difficult and took just a few hours. The biggest challenge was making sure everything was square. Afterwards, Kallie painted them a nice, subtle green. We still don’t have bees but we have an order for a nuc (short for nucleus) in, which is about 10,000 bees on five frames that already have brood (babies), food and honey. For the other hive we are hoping to catch a wild swarm or lure them into the hive with wax foundation and lemongrass oil.


Beekeeping will certainly be a new experience for us. We just hope it all works out and that we can get some honey at some point. Until next time, God Bless.
-Dale
